How to Make Henna Paste
Mixing Natural Henna Paste
These are the instructions to mix up 100 grams, but smaller batches can be made, just divide up the recipe.
Ingredients:
Quality natural henna powder: 100 grams
We recommend body quality Jamila, which is both high quality and beginner friendly.
Essential oil: 10ml
Certain oils help to deepen the stain. Eucalyptus, lavender, tea tree, or cajaput are all great options.
Sugar: 1-4 tbsp.
Regular white sugar, raw sugar, brown sugar, fructose, etc. (Powdered sugar or honey are not recommended.)
Sugar helps draw moisture from the air, and helps the henna stick to the skin.
*Lemon Juice: (amount varies)
Lemon Juice slows down stain release. It takes longer for the henna to be ready than a water mix, but it also gives you a bigger window of time to use it.
(Usually around a cup is needed, but it can vary.)
Instructions:
Gradually stir in lemon juice.
Put most of the henna powder into a glass, metal, or ceramic bowl or a plastic bowl you use only for henna.
Keep a little of the powder out, in case you need to adjust the consistency later.
Some recipes call for adding the essential oil and sugar later, but some find it easier to do it all at once. Either way works well.
Cover and Wait for 8 to 12 Hours
If you are waiting to add the sugar and oil, gradually add lemon juice until the paste reaches mashed potato consistency.
If you added all of the ingredients at once bring the henna paste to more of a thick frosting consistency.
Cover, and place in a warm spot for 8-10 hours.
Check Henna Paste Consistency
After 8-10 hours, check your paste. Add the oil and sugar if you didn’t in step 1, and stir or mix thoroughly.
If necessary, add more lemon juice, until it’s the consistency of frosting.
A mixer can be very helpful, but it can be stirred by hand, just make sure you stir until it’s smooth and lump free.
Wait 8-10 Hours Again, Then Stain Test
Replace cover, and put back in a warm spot.
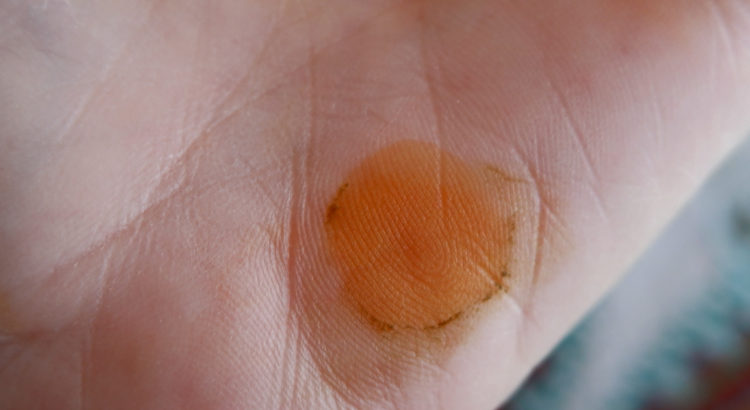
After 8-10 more hours, do a stain test. Palm is a great spot. Just put a dot of henna on your skin, wait 5 minutes, and wipe off. When it’s bright orange, it’s ready.
If the stain in not bright orange, cover the henna back up, and test again in 2-4 hours.
Check Consistency
At this point, it should be the consistency of thin frosting. Add lemon juice or henna powder to adjust.
One option is to make a wide topped cone that you can spoon a little henna paste into. Try drawing some lines and dots to see how it feels, and adjust as needed.
Too wet, and the henna won’t hold it’s shape. Too dry and it won’t stick well to itself or the skin. But within that range there is quite a bit of variation for personal preference. Play around and figure out what feels right for you.
Fill the carrot bag.
Putting the carrot bag in a large cup makes this easier. Once full, twist tie the big end. Cut a small hole in the pointy end. You can use the other carrot bag to hold it, reducing the mess.
You can either freeze the entire bag to use later, or fill cones and freeze those. If you freeze cones, we recommend you use the red scotch tape to roll cones, as it holds up better with freezing and thawing.
Fill your cones, and enjoy!
More Info About Natural Henna Paste
Prefer to use water?
Henna made with lemon juice slows down dye release, which means it stays good a bit longer. But henna made with water is ready much faster, making it ideal if you need it sooner.
Don’t use tap water, as it contains chorine. Use distilled or filtered water instead.
Follow the above directions, except for timing. It will be release dye much quicker, 4-10 hours.
Storing Your Natural Henna Paste
Warm temperatures will speed up both dye release and demise, cool temperatures will slow it. So when you’re waiting for the nice orange test result, warmer is better, but once you reach that stage, you want to keep henna as cool as possible.
We recommend you keep your henna frozen until ready to use. Lemon mix henna will usually keep at least 2-3 days if kept cool (refrigerator or cooler) and a year or more in the freezer. At room temperature it really varies, in the sun on a hot day, it’ll be done within hours, in cooler temps, it may be okay for a day or two. Spot tests are a great way to test any older cones you’re unsure about.
